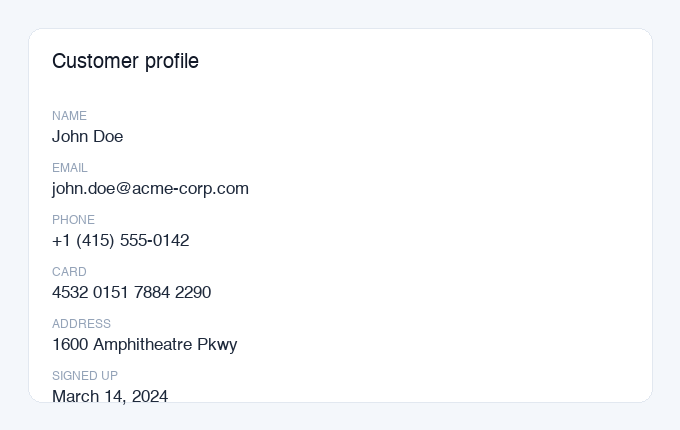
You need to share a screenshot. Maybe it's a support ticket, an invoice, a chat or a dashboard, and it contains someone's name, email, phone number or card details. Redacting it should take seconds, not a trip into Photoshop. This guide covers the fastest safe way to do it on any device, plus the mistakes that quietly leave the data recoverable.
The quickest way: redact online
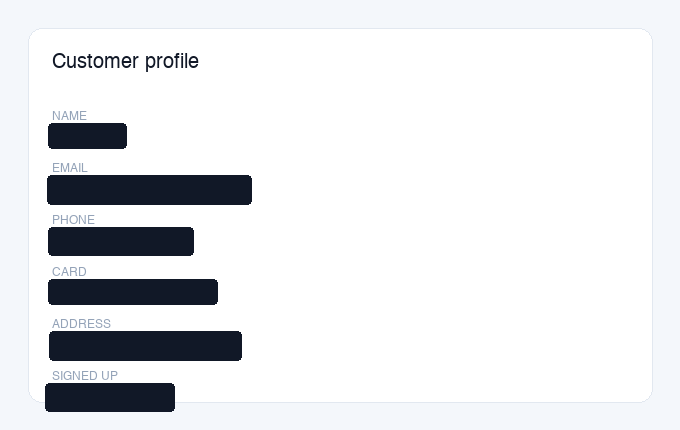
The fastest route is a browser tool that finds the personal data for you and lets you black it out. With Privshot it's four steps:
- 1. Drop your screenshot in. Any PNG, JPEG or WebP works, whether it's a form, a document or a chat window.
- 2. Let it auto-detect. Names, emails, phone numbers, cards, addresses, national IDs and more get found and boxed automatically, so you don't have to hunt for every field by hand.
- 3. Review and adjust. Add a box over anything it missed, resize or delete any box, annotate if you like. You stay in control of the final result.
- 4. Export. Download a clean PNG or copy it straight to your clipboard.
The image is processed server-side and discarded right after, so nothing is stored, shared with third parties, or used to train any model. There's no account to create and no watermark on the free web editor.
Why automatic detection beats doing it by hand
The dangerous part of redaction isn't drawing the box. It's missing a field. A screenshot of a support conversation can hide an email in a signature, an order number in a URL, or a phone number three messages up. Automatic detection reads every piece of text in the image with OCR, works out what's personal, and covers all of it at once. You review instead of search, which is faster and far less error-prone than scanning a busy screenshot with your eyes.
Redacting on your phone or computer without a tool
If you can't use a dedicated tool, you can still redact manually. Just do it correctly. The rule that always applies: draw a solid, opaque shape (never a highlighter or blur), then save a new flattened copy.
- iPhone / iPad: open the screenshot in Photos, tap Edit, then Markup. Use the solid pen (not the highlighter), set its color to black, and scribble over each sensitive field until it's fully covered.
- Android: use Markup in Google Photos or your device's built-in editor and draw a solid shape over the data.
- Windows: Snipping Tool or Paint, with a filled black rectangle. Then use Save as to write a new flattened copy.
- macOS: Preview, then Markup, then a filled rectangle, then File → Export to a flat PNG.
If you're on Apple hardware, we wrote a device-by-device walkthrough: how to redact a screenshot on iPhone and Mac.
The mistakes that make redaction useless
Most redaction leaks come from a handful of avoidable errors:
- Blurring or pixelating sensitive text. Blur and mosaic can often be reversed, especially for short, structured data like card or phone numbers. We covered this in why blurring is not safe redaction and whether pixelation is reversible. Use a solid box.
- Using a movable "black box" layer. In PDFs and design tools, a black rectangle sits on top of the text, so anyone can move or delete it and read what's underneath. Always flatten to an image.
- Boxes that don't fully cover the text. Leaving the tops or tails of letters visible can be enough to read them. Cover the whole field, edges included.
- Sharing the original by accident. Keep the redacted copy separate and double-check which file you're attaching.
- Forgetting metadata. Photos can carry GPS coordinates in their EXIF data, and some files embed a thumbnail of the original. Re-exporting the image as a fresh PNG strips both.
The one rule: a safe redaction removes the information, it doesn't just hide it. If the pixels underneath still exist, so does the leak.
How to check your redaction actually worked
Before you send the file, give it a 10-second test. Open the exported image and try to select the text. On a flattened PNG there's nothing to select, which is exactly what you want. Zoom in on each box to confirm no letter edges peek out. If the file came from a PDF or a design tool, make sure you exported a rasterized image and not a document where the box is still a separate object. Finally, check you're attaching the redacted copy, not the original sitting next to it in your downloads folder.
Redacting a lot of screenshots?
If you're redacting images at scale, for support tooling, bug reports or log pipelines, doing it by hand doesn't scale. Privshot has a REST API that detects and redacts PII in images programmatically, with a free tier to start. You send one request and get a clean image back. There's a step-by-step tutorial in redact PII from images with an API (Python).
Frequently asked questions
How do I redact a screenshot for free?
Open the screenshot in an online tool like Privshot, let it auto-detect the personal data, review the boxes it drew over names, emails, phone numbers and cards, then export a flattened PNG. It's free and needs no account or Photoshop.
Is it safe to just blur the text in a screenshot?
No. Blur and pixelation can often be reversed, especially on short structured data like card or phone numbers. Use a solid, opaque box that overwrites the pixels instead.
Can a black box on a screenshot be removed?
Only if it's a separate movable layer, as in a PDF or design tool. Once you flatten the image to a PNG or JPEG, the box overwrites the pixels underneath and can't be peeled off.
Do I need to remove metadata from a screenshot too?
Often yes. Photos can carry EXIF data such as GPS location, and some files embed a thumbnail of the original. Re-exporting the redacted image as a fresh PNG strips both. There's more on this in how to remove personal information from a photo.
In short
Redacting a screenshot safely comes down to three things. Find every piece of personal data, cover it with a solid fill (never blur), and export a flattened image. An online tool does all three for you in seconds, so try it here.